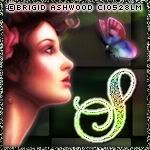
Checkered Fantasy Forum Set


You will need:
Toxic Desirez Textures 1 -5, which can be downloaded HERE
Bokeh Textures by FroozenTears, which you can download HERE
(Or other textures of your own choosing)
My supplies HERE, which include the checkered background, my star cluster tube and font.
Xero plugin (optional)
Eye Candy 4000 (optional)
This tutorial was written using PSP 9, but is compatible with other versions. This tutorial was also written for those with a working knowledge of PSP.
Keep in mind that some tubes will work better than others, and always feel free to play around with any settings to suit your own preferences.
Open a new transparent image, 600 x 250.
Selections>Select all.
Copy the checkered background and paste into selection on your
canvas. Ctrl+D to deselect.
Use your magic wand with these settings:

Click on one of the black squares and they should all select.
New raster layer.
Choose one of the textures (I chose Texture 1), copy and paste into
selection on your canvas.
Selections>Invert. Modify>Expand by 3. New raster layer.
Choose another texture (I chose Texture 3). Copy and paste into selection.
Duplicate this layer. Add noise with these settings:

Drag this layer below the original layer.
Add drop shadow with these settings:

Repeat but change V & H to -2. Change blend mode of this layer to Darken.
Highlight your top layer and add a new raster layer.
In your materials palette, choose two colors. I chose #7886cd for foreground
and #fa84dd for background. Change foreground to gradient with these settings:

and flood fill the new layer.
Change blend mode to Hue. Deselect.
New raster layer. Selections>Select All.
Copy the Bokeh Texture, Image 9 and paste into selection.
Change the blend mode to Overlay and change opacity to around 48.
Deselect. Add noise, same as above.
Open your tube. Copy and paste as a new layer. Resize if needed (if
using the same tube I used, resize 80%) and position to your liking.
Duplicate. On the bottom original tube layer, add gaussian blur with a radius
of 2. On the top tube layer, change blend mode to soft light or hard light,
whichever you prefer and looks right for your tube.
Close all layers except the two tube layers. Merge visible. Duplicate.
Effects>Plugins>Xero>Ultraviolet with these settings:

Change blend mode to Color (Legacy). Merge Visible. Re-open the other layers.
On the merged tubed layer, add a drop shadow with above setting but change color to white.
Add new raster layer. Selections>Select All. Modify>Contract by 4.
Invert. Flood fill with gradient. Add noise, same settings as above. Ctrl+Y to apply again.
Add drop shadow with these settings:

Apply again but change Vertical to -1 and Horizontal to -2. Deselect.
Copy the stars and paste them as a new layer. Arrange them as you like.
Change blend mode to Luminance. You can also add your own embellishments if you choose.
Add copyright information.
Add your name. For my name I selected one of my squares with the
rectangle tool, copy merge and pasted as a new layer, then seamless
tiled it and used it as my background pattern, foreground nul. Then I added
the same noise. Then I added Gradient glow with these settings:

Duplicate. Merge down.
Drop shadow with these settings:

Adust>Sharpen.
Save as .jpg and you're done :-) Do not close this yet, we will use it to make your avatar.
Now to make your avatar!
Open a new transparent image, 150 x0 150.
Close all layers on your main image canvas except all your texture layers
and the stars (or your embellies). Copy merged.
Paste as new layer on your avatar canvas. Find the position you like.
Now open your tube layer on your main canvas, copy and paste as a new
layer on your avatar canvas and position and resize as you like (I resized
my tube by 50%). Sharpen if needed.
New layer. Select All. Modify>Contract 3. Invert.
Flood fill with same gradient we used earlier.
Add drop shadows as before. Ctrl+D.
Now add your copyright and initial as we did before and we're done :)
Another example: