Pages

Sunday, April 29, 2012

Turquoise & Obsidianne Snags

Thought I would make some snags from this beautiful kit called Turquoise & Obsidianne by Tigroune Scap.  Download this FTU kit from her blog HERE.  My snag set includes 13 tags: 


Sorry for the crappy preview.  If you can't make out what they say, they say: Beautiful, Checking In, Congrats, Get Well, Greetings, Happy Birthday, Mail Checked, Please, Snagged, Sorry, Thank You, You are Welcome and Welcome to the group.  Size is 440 x 385.

Click below to download the zip.


Thursday, April 19, 2012

Masks 1 - 10

I've been playing around and thought I'd make a few masks.  I've made some before but have never offered them up so thought I'd go ahead and offer these in case anyone might be interested :) 


Download HERE

Friday, April 13, 2012

Spring Delight


Hi everyone!  I've just written a new tutorial for a challenge on a forum I hang out at.  I hope you like it :)


I used PSP 9, but is compatible with other versions.  This tutorial was written for those with a working knowledge of PSP.


For this tutorial, you will need:

Spring Delight scrapkit by Fiona Devil, which you can download from her blog HERE
BeckyMask021 - her masks are no longer available online but I will post it here for you
Tube of your choice - the tube I am using is a Tony Tzanoukakis exclusive for
the 4Corners Taggers forum.  Join the fun and you can earn access to
this tube!  ;-)  You can go to his store HERE to purchase some of his awesome art!
Font of your choice
EyeCandy 400 (Optional)


Open a new transparent image, 600 x 600.
Open Flower 3.  Copy and paste as a new layer.  Resize 50%, Bicubic.
Open Flower 5. Copy and paste as a new layer. Resize 30%, Smart size.
Image>Mirror.  Position to the right of the first flower.
Open Flower 4. Copy and paste as a new layer. Resize 50%, Bicubic.
Arrange them into a little cluster, like so:


Merge visible and resize 40%, Smart size.
Effects>Plugins>MuRa's Meister>Copies.  Choose Encircle on the dropdown list and use the default settings, except change Number to 6.


Open Frame3 and paste as a new layer.  Resize 90%, Bicubic.
Drag this layer under the wreath you just made.
Highlight the top layer and merge down.
Resize 125%, Smart size and Adjust>Sharpness>Sharpen.
Use your magic wand with the settings below and click inside the wreath:


Selections>Modify>Expand>10.
Add a new raster layer. Copy Paper9 and paste into selection.
Drag this layer below the wreath.
Open WhiteLace and paste as a new layer.  Selections>Invert and hit delete on your keyboard.
Change blend mode to soft light and lower opacity to 50-55.Ctrl-D to deselect.
Open leaf frame.  Paste as new layer.
Resize 120% and adjust to the center of your wreath.  I used my eraser tool and erased the left part of the leaf that was going to the edge


Open Grass, resize 60%.  Effects>Mirror.  Position to the left of the wreath.  Duplicate.  Position to the left.
Open Dandilion.  Copy and paste as a new layer.
Resize 50% and position as you like.  Sharpen if necessary.
Open Flower2 and paste as a new layer.  Resize 60%.
Position to the left of the wreath. 
Duplicate and drag the duplicated layer to the top of your layer palette.
Use your eraser tool, size around 55 and erase the parts that are over the wreath on the bottom and the side:


Highlight your bottom layer.  Add a new raster layer.
Selections>Select All. 
Open Paper2.  Copy and paste into selection.
Drag this layer down to make it your bottom layer.  Deselect.
Make sure your mask is opened.  If you don't have it, click on it to open it full size, then right click and save:


Layers>New Mask Layer>From Image and navigate to your mask (only Source Luminance should be ticked).
Merge group.  Duplicate.
On the bottom layer, Adjust>Blur>Gaussian blur>7.
On the copy layer, Effects>Edge effects>dilate.  Ctrl-Y to repeat.
Highlight your top layer.
Open your tube, copy and paste as a new layer.  Position as you like.
Add drop shadow.  Here's the settings I used:


Add drop shadows to your other layers, except for the top flower2 layer, leaf frame layer and mask layers.
Click back on your top layer and add your copywrite info and your text/name. 
For my text, I used PegsannaHMK, colour #6d8b17.
Then I added a gradient glow using EyeCandy 4000.

I hope you have enjoyed my tutorial!

Here is another example using a FREE tube from Roman Zaric, which you can download from PTE


Please feel free to link to this tutorial, and/or print it out for your own personal use, but DO NOT copy it in ANY way to put on-line, pass out, or re-write without my permission.  Any resemblance to any other tutorial like this is purely coincidental.  My tuts are registered with TWI.  Thank you.  This tutorial was written April 12, 2012.   ©Sharon Murray


Friday, April 6, 2012

Love Grows Wordart

Hi, I made this wordart from a challenge that was posted on one of the forums I hang out at HERE.  Have a visit and stay awhile!  :)

This wordart comes in grayscale layers, 300 dpi and size is 883 x 986 pixels.  Sample is included, also.  Please note this is for Personal Use only.


Enjoy!

Download HERE

Sunday, April 1, 2012

Checkered Fantasy Forum Set

Checkered Fantasy Forum Set


You will need:
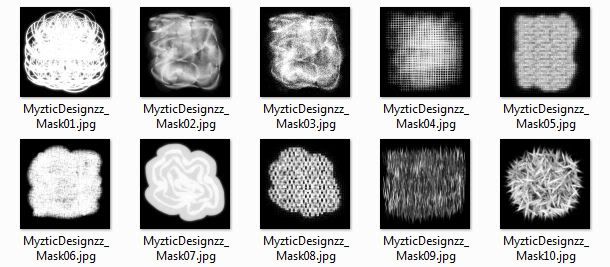
Toxic Desirez Textures 1 -5, which can be downloaded HERE
Bokeh Textures by FroozenTears, which you can download HERE
(Or other textures of your own choosing) 
My supplies HERE, which include the checkered background, my star cluster tube and font.
Xero plugin (optional)
Eye Candy 4000 (optional)


This tutorial was written using PSP 9, but is compatible with other versions.   This tutorial was also written for those with a working knowledge of PSP.

Keep in mind that some tubes will work better than others, and always feel free to play around with any settings to suit your own preferences.


Open a new transparent image, 600 x 250.
Selections>Select all. 
Copy the checkered background and paste into selection on your
canvas.  Ctrl+D to deselect.
Use your magic wand with these settings:


Click on one of the black squares and they should all select.
New raster layer.
Choose one of the textures (I chose Texture 1), copy and paste into
selection on your canvas. 
Selections>Invert.  Modify>Expand by 3.  New raster layer.
Choose another texture (I chose Texture 3).  Copy and paste into selection.
Duplicate this layer.  Add noise with these settings:


Drag this layer below the original layer.
Add drop shadow with these settings:


Repeat but change V & H to -2.  Change blend mode of this layer to Darken.
Highlight your top layer and add a new raster layer.
In your materials palette, choose two colors.  I chose #7886cd for foreground
and #fa84dd for background.  Change foreground to gradient with these settings:


and flood fill the new layer.
Change blend mode to Hue.  Deselect.
New raster layer.  Selections>Select All. 
Copy the Bokeh Texture, Image 9 and paste into selection.
Change the blend mode to Overlay and change opacity to around 48.
Deselect.  Add noise, same as above.
Open your tube.  Copy and paste as a new layer.  Resize if needed (if
using the same tube I used, resize 80%)  and position to your liking.
Duplicate.  On the bottom original tube layer, add gaussian blur with a radius
of 2.  On the top tube layer, change blend mode to soft light or hard light,
whichever you prefer and looks right for your tube.
Close all layers except the two tube layers.  Merge visible.  Duplicate.
Effects>Plugins>Xero>Ultraviolet with these settings:


Change blend mode to Color (Legacy).  Merge Visible.  Re-open the other layers.
On the merged tubed layer, add a drop shadow with above setting but change color to white.
Add new raster layer.  Selections>Select All.  Modify>Contract by 4.
Invert.  Flood fill with gradient.  Add noise, same settings as above.  Ctrl+Y to apply again.
Add drop shadow with these settings:


Apply again but change Vertical to -1 and Horizontal to -2.  Deselect.
Copy the stars and paste them as a new layer.  Arrange them as you like.
Change blend mode to Luminance.  You can also add your own embellishments if you choose.
Add copyright information.
Add your name. For my name I selected one of my squares with the
rectangle tool, copy merge and pasted as a new layer, then seamless
tiled it and used it as my background pattern, foreground nul.  Then I added
the same noise.  Then I added Gradient glow with these settings:


Duplicate.  Merge down.
Drop shadow with these settings:


Adust>Sharpen.
Save as .jpg and you're done :-)  Do not close this yet, we will use it to make your avatar.

Now to make your avatar!

Open a new transparent image, 150 x0 150. 
Close all layers on your main image canvas except all your texture layers
and the stars (or your embellies).  Copy merged.
Paste as new layer on your avatar canvas.  Find the position you like.
Now open your tube layer on your main canvas, copy and paste as a new
layer on your avatar canvas and position and resize as you like (I resized
my tube by 50%).  Sharpen if needed.
New layer.  Select All.  Modify>Contract 3. Invert.
Flood fill with same gradient we used earlier.
Add drop shadows as before.  Ctrl+D.
Now add your copyright and initial as we did before and we're done :)

Another example:


Please feel free to link to this tutorial, and/or print it out for your own personal use, but DO NOT copy it in ANY way to put on-line, pass out, or re-write without my permission.  Any resemblance to any other tutorial like this is purely coincidental.  My tuts are registered with TWI.  Thank you.  This tutorial was written April 1, 2012.   ©Sharon Murray


Sunday, February 19, 2012

Glitters


There are lots of ways to make your own glitters. I was playing
around in PSP and was fiddling around with some filters (I have
loads that I have never used so thought I'd get to know some of
them lol) and came up with this way to make your own glitter tiles.


I used PSP9 for this tutorial, but is compatible with other versions.
You will also need Animation Shop.
Filters used: Kang 3 (Immosque)
MuRa's Meister (Copies)
DSB Flux (Bright Noise)

Open a new image, 150 x 150.
Flood fill with a color of your choice (Color really won't matter since
the filters are going to change the color anyway, and you can colorize at the
end.)
Effects/Plugins/Kang/Immosque. (You can use my settings are play around
with your own.)


(124, 175, 142, 201, 179, 209, 192)


Effects>Plugins>MuRa's Meister>Copies>Star Cluster with default settings.
Effects>Image effects>Seamless Tiling>Default settings.
Effects>Plugins>dsb flux>Bright Noise:


Copy and paste in AS.
Back to PSP. Bright noise, click once on mix.
Copy and paste after current frame in AS.
Back to psp and bright noise again, click once on mix.
Copy and click on your second frame in AS, then paste after current frame.
Save and you're done!


To colorize your glitter, open in AS.
Edit>Select All.
File>Export Frames>To Paint Shop Pro.
Once in PSP, the bottom layer should be highlighted.
Adjust>Hue and Saturation>Colorize and adjust the sliders to
get to the color you want.
(To get the gold that I got, match your settings to mine:


Highlight the middle layer. Press Ctrl+Y to repeat (I love this shortcut!).
Highlight the top layer and Ctrl+Y again.
Click on the X icon like you're going to close.
When a pop-up box comes up, click on No.
Another pop-up box will come up asking if you'd like to update
your settings in AS. click Yes.
There is your new color! Save and ready to use!